路漫漫其修远兮,吾将上下而求索。 网站首页学无止境
python selenium模拟浏览器操作实战(武汉大学原教务系统)

## 1.项目简介 因为信息门户如果用requests发post请求进行模拟登录的操作比较麻烦(自己太low,信息门户的加密算法没搞明白),所以没办法就只能考虑通过其他途径去做。 采用selenium就是一个比较好的解决办法(~~虽然比较慢,但是至少能用~~ ),模拟浏览器输入账号密码然后点击登录即可实现登录,然后获取相关cookies等信息就可以进行后续成绩获取等操作了。 ## 2.参考代码 ```python #!/usr/bin/env python # -*- coding:utf-8 -*- # Author : Gary import time from selenium import webdriver chrome_options = webdriver.ChromeOptions() # options.add_experimental_option('excludeSwitches', ['enable-automation'])#提示浏览器不是selenium chrome_options.add_argument('--headless') # 无头 chrome_options.add_argument('--disable-gpu') chrome_options.add_argument('--no-sandbox') # 这个配置很重要 chrome_options.add_experimental_option('excludeSwitches', ['enable-automation']) # 此步骤很重要,设置为开发者模式,防止被各大网站识别出来使用了Selenium class Selenium: def __init__(self): # self.driver = webdriver.Chrome(options=chrome_options) # 有配置的初始化浏览器 self.driver = webdriver.Chrome() # 不使用有配置的,方便看操作 self.driver.maximize_window() # 窗口最大化 def login(self, username, password): self.driver.get('http://ehall.whu.edu.cn/appShow?appId=5382714380693158') # 走信息门户认证的教务系统url,不用输入验证码 # 找到输入框并输入账号密码 Username = self.driver.find_element_by_id("username") Username.send_keys(username) Password = self.driver.find_element_by_id("password") Password.send_keys(password) time.sleep(0.2) self.driver.find_element_by_xpath('//*[@id="casLoginForm"]/p[5]/button').click() # 登录按钮 try: # name=self.driver.find_element_by_id("ampHeaderToolUserName").text#获取姓名,内容为空,弃用 name = self.driver.find_element_by_id("nameLable").text # 获取学生姓名 acade = self.driver.find_element_by_id("acade").text # 获取学生院系 # cookies = self.driver.get_cookies()[0] # print('登录成功 ...') # self.driver.quit() # html = self.driver.execute_script("return document.documentElement.outerHTML") html = self.driver.find_element_by_xpath('//*[@id="system"]').get_attribute('onclick') # 不要用 driver.page_source,那样得到的页面源码不标准 # print(html) csrftoken = html.split(",")[0].split('csrftoken=')[-1] print('登录成功!') return True, acade, name, self.driver.get_cookies(), csrftoken except Exception as e: print(str(e)) try: msg = self.driver.find_element_by_id("msg").text except Exception as e: # time.sleep(5) # cpatchaError=self.driver.find_element_by_id("cpatchaError").text print(str(e)) msg = '您尝试的次数过多,请明天再试!或解决方案:通过浏览器成功登录一次信息门户。再重试认证本系统' # self.driver.quit() return False, msg if __name__ == '__main__': username = 'test' # 你的信息门户账号 password = 'test' # 你的信息门户账号对应的密码 spider = Selenium() print(spider.login(username=username, password=password)) # 查看登录结果 ``` ## 3. todo或者应用 1. 登录成功后得到的cookies可以获取自己的成绩信息(计算GPA啥的)等 ~~2. 原本的抢课也是可以做的,但是换系统了用不了了~~
- python
- 2020-12-19
- 666已阅读
- 666
python采用requests+bs4爬取Gary个人博客学习页面并用mysql存储(https://www.gary666.com/learn)
## 爬取说明  博客链接:[链接](https://www.gary666.com/learn),https://www.gary666.com/learn 输出:页面中所有的文章的标题、内容、作者、文章分类、时间 对应上图(作者是Gary、文章分类python、时间20220-7-9) ## 参考代码 ```python # -*- coding: utf-8 -*- # author:Gary # 第一步,导入需要用到的库 import requests from bs4 import BeautifulSoup # 根据需要引入存储数据的库 import pymysql import time # 设置爬取时间间隔,防止访问过快ip被封等 # 第二步,请求网页内容 url = 'https://gary666.com/learn' # 需要请求的网页的链接 html = requests.get(url) # get方式请求数据 # print(html.status_code) # 查看请求的状态码(200表示请求正常,404内容没有找到) html.encoding = html.apparent_encoding # 设置编码,防止由于编码问题导致文字错乱 # print(html.text) # 查看请求到的内容 html_content = html.text # 第三步,解析你需要的内容 # html.parser,lxml soup = BeautifulSoup(html_content, "html.parser") all_div = soup.find_all("div", class_="blogs") # 观察发现所有的内容都在class为blogs的div中,所以直接定位 # print(all_div) data_list = [] # 存储所有数据,供存储使用 for div in all_div: # 循环查看每个超链接的文字和url if div is None: # 如果div的内容为空 continue else: title = div.find('h3').find('a').text # 文章标题 content = div.find('p').text # 文章内容 author = div.find('li', class_='author').text # 作者 t_type = div.find('li', class_='lmname').text # 文章分类 timer = div.find('li', class_='timer').text # 时间 single_blog = (title, content, author, t_type, timer) # 单个blog内容 data_list.append(single_blog) # 添加到所有的数据中去 print(title, content, author, t_type, timer) # 选做内容 # 第四步,存储数据 def insert_data(datalist): # 连接数据库,主机名默认本地,端口默认3306,用户名默认root,字符集默认utf-8,需要传入数据库密码和数据库名 # 你的密码password参数,数据库名db参数,下面示例密码是your_password,数据库名是spider(需要自己先建立好数据库表) conn = pymysql.connect(host='127.0.0.1', port=3306, user='root', password='your_password', db='spider', charset='utf8') # 连接数据库 cur = conn.cursor() # 用于访问和操作数据库中的数据(一个游标,像一个指针) # 示例是spider中建立了blog表,然后表的属性有title, content, author, t_type, timer,正常运行先需要建立好 # content的数据类型建议设为text sql = 'insert into blog(title, content, author, t_type, timer) values(%s,%s,%s,%s,%s)' # 插入多条 cur.executemany(sql, datalist) # data_list类型是列表中嵌套多个元组比如[(),(),()] conn.commit() # 提交事务,执行了这一步数据才真正存到数据库 ''' 如果需要单条插入放入到上面循环的36行后执行即可 sql='insert into blog(title, content, author, t_type, timer) values("{}","{}","{}", "{}","{}")'.format(title, content, author, t_type, timer)#插入单条 cur.execute(sql) ''' cur.close() # 关闭游标 conn.close() # 关闭数据库连接 # 执行插入数据函数 # print(data_list) # insert_data(data_list) # 爬取多页(爬取其他页面数据) def many_page(page): # 设置头部信息 headers = { 'User-Agent': 'Mozilla/5.0 (Windows NT 10.0; Win64; x64) AppleWebKit/537.36 (KHTML, like Gecko) Chrome/83.0.4103.116 Safari/537.36'} # url = 'https://gary666.com/learn?page=2' # 通过观察发现是否page控制的翻页,page=几就是第几页 # 方法一,直接修改url(参数不多推荐这个) single_url = 'https://gary666.com/learn?page={}'.format(page) res = requests.get(single_url, headers=headers) # 获取网页内容 # 方法二,构造参数,通过参数 ''' params = {'page':page} res=requests.get(url='https://gary666.com/learn',params=params,headers=headers)#获取网页内容 ''' res.encoding = res.apparent_encoding # 设置编码 if res.status_code == 200: # 如果状态码为200则正常 return res.text # 返回网页内容 else: print('爬取网页异常') # 通过bs4解析网页内容 def ana_html(html): soup = BeautifulSoup(html, "html.parser") all_div = soup.find_all("div", class_="blogs") # 观察发现所有的内容都在class为blogs的div中,所以直接定位 # print(all_div) data_list = [] # 存储所有数据,供存储使用 for div in all_div: # 循环查看每个超链接的文字和url if div is None: # 如果div的内容为空 continue else: title = div.find('h3').find('a').text # 文章标题 content = div.find('p').text # 文章内容 author = div.find('li', class_='author').text # 作者 t_type = div.find('li', class_='lmname').text # 文章分类 timer = div.find('li', class_='timer').text # 时间 single_blog = (title, content, author, t_type, timer) # 单个blog内容 data_list.append(single_blog) # 添加到所有的数据中去 print(title, content, author, t_type, timer) return data_list # 返回数据列表 if __name__ == '__main__': for page in range(1, 9): # range的范围就是页数的范围 print('正在爬取第{}页'.format(page)) html = many_page(page) # 获取网页内容 data_list = ana_html(html) # 解析需要的内容 time.sleep(0.5) # 每爬取一次停止0.5s在继续爬取 insert_data(data_list) # 存储数据 print('爬取完成!') ```
- python
- 2020-07-30
- 666已阅读
- 666
Python爬虫之xpath的基本使用
# 1.XPath介绍 这篇文章比较混,emmm,基础使用就是我写的这三种方法,详细可以看看参考的那个链接。 XPath,全称 XML Path Language,即 XML 路径语言,它是一门在 XML 文档中查找信息的语言。最初是用来搜寻 XML 文档的,但同样适用于 HTML 文档的搜索。所以在做爬虫时完全可以使用 XPath 做相应的信息抽取。 ==我的理解就很像路径查找法,就像你在windows里面找文件一样,找到对应路径就可以了,然后bs4更想标签选择法,根据标签迭代定位。== 官方帮助文档:https://www.w3.org/TR/xpath/ # 2.常用规则  # 3.相关环境的安装 ```python pip install lxml ``` # 4.示例 ## 4.1 绝对路径查找内容 对应的xpath可以通过浏览器复制得到。 先通过F12或者检查等方法调出浏览器调试模式。  然后选中右上角的箭头去点击你想要的内容 然后在右边下面的箭头右键,找到copy,然后扩展菜单中找到copy Xpath点击即可,然后复制到xpath(“复制的内容”)应用即可。 ### 4.1.1获取某个标签的内容 注意,获取a标签的所有内容,a后面就不用再加正斜杠,否则报错。 ```python # -*- coding: utf-8 -*- # author:Gary # 第一步,导入需要用到的库 import requests from lxml import etree res=requests.get('https://www.gary666.com/learn')#获取网页内容 res.encoding = res.apparent_encoding # 设置编码,防止由于编码问题导致文字错乱 # 利用 etree.HTML 把字符串解析成 HTML 文件 #res.text就是获取把网页内容转为字符串 html = etree.HTML(res.text) #绝对路径定位: title=html.xpath('/html/body/div[2]/div[1]/div[1]/h3/a')#通过调用xpath这个方法就可以获取到对应路径的内容,返回一个列表,需要通过循环输出 for i in title: print(i.text)#.text输出文本内容 title=html.xpath('/html/body/div[2]/div[1]/div[1]/h3/a/text()')[0]#直接通过text()方法获取文本 print(title) ``` ### 4.1.2获取某个标签的属性 这里可以通过遍历拿到某个属性的值,查找标签的内容,通过@属性名获取 ```python title_href=html.xpath('/html/body/div[2]/div[1]/div[1]/h3/a/@href')[0]#通过/@属性名即可获取对应的属性值 print(title_href) ``` ### 4.1.3获取指定标签对应属性值的内容 使用xpath拿到得都是一个个的ElementTree对象,如果需要查找内容的话,还需要遍历拿到数据的列表。 查到绝对路径下a标签属性等于/detail?dbname=study&num=38的内容。 ```python title2=html_data = html.xpath('/html/body/div[2]/div[1]/div[1]/h3/a[@href="/detail?dbname=study&num=38"]/text()')[0] print(title2) ``` # 5.完整代码 ```python # -*- coding: utf-8 -*- # author:Gary # 第一步,导入需要用到的库 import requests from lxml import etree res = requests.get('https://www.gary666.com/learn') # 获取网页内容 res.encoding = res.apparent_encoding # 设置编码,防止由于编码问题导致文字错乱 # 利用 etree.HTML 把字符串解析成 HTML 文件 # res.text就是获取把网页内容转为字符串 html = etree.HTML(res.text) # 获取某个标签的内容 # 绝对路径定位: title = html.xpath('/html/body/div[2]/div[1]/div[1]/h3/a') # 通过调用xpath这个方法就可以获取到对应路径的内容,返回一个列表,需要通过循环输出 for i in title: print(i.text) # .text输出文本内容 # 获取某个标签的属性的值 title1 = html.xpath('/html/body/div[2]/div[1]/div[1]/h3/a/text()')[0] # 直接通过text()方法获取文本 print(title1) title_href = html.xpath('/html/body/div[2]/div[1]/div[1]/h3/a/@href')[0] # 通过/@属性名即可获取对应的属性值 print(title_href) # 获取指定标签对应属性值的内容 title2 = html_data = html.xpath('/html/body/div[2]/div[1]/div[1]/h3/a[@href="/detail?dbname=study&num=38"]/text()')[0] print(title2) ``` # 6.参考 https://blog.csdn.net/xunxue1523/article/details/104584886
- python
- 2020-06-20
- 666已阅读
- 666
python采用requests+bs4爬取豆瓣top250图书信息
# 1.介绍 使用python采用requests+bs4爬取豆瓣top250图书信息,参考代码中都有注释就不详细说了。 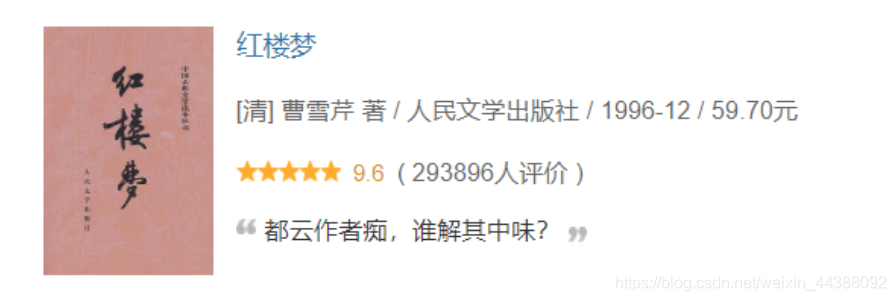 链接:https://book.douban.com/top250?start=0 可以输出的内容:(对应上图举例) 图书封面的链接:https://img1.doubanio.com/view/subject/s/public/s1070959.jpg 书名:红楼梦 作者:[清] 曹雪芹 著 出版社: 人民文学出版社 发行年份:1996-12 价格:59.70元 评分:9.6 评价人数:293896 名言:都云作者痴,谁解其中味? **实现的功能:可以分页爬取所有top250的图书信息以及存储相关数据进入数据库**。 # 2.参考代码 ```python # -*- coding: utf-8 -*- # author:Gary import requests # 获取网页内容 from bs4 import BeautifulSoup # 解析网页内容 import pymysql # 获取网页的内容 def get_html(url): header = { 'User-Agent': 'Mozilla/5.0 (Windows NT 10.0; Win64; x64) AppleWebKit/537.36 (KHTML, like Gecko) ' 'Chrome/79.0.3945.130 Safari/537.36'} res = requests.get(url, headers=header) # 获取网页,并带有伪装的浏览器头,一般好的网站会有检测是不是程序访问 res.encoding = res.apparent_encoding # 设置编码,防止乱码 # print(res.text)#输出网页内容 return res.text # 返回网页的内容 # 通过bs4解析,主要是标签选择器 def ana_by_bs4(html): soup = BeautifulSoup(html, 'html.parser') # 注意需要添加html.parser解析 tables = soup.find_all("table") # 选择table标签 # 或者通过tr的class属性定位 # trs = soup.find_all('tr', class_='item') data_list = [] for table in tables: img = table.find('img')['src'] # 图片链接 # title = table.find('div', class_='pl2').text.strip() # 正标题 title = table.find('div', class_='pl2').find('a')['title'] # 去除多余换行 strInfo = table.find('p', class_='pl').text.strip() # 作者、出版社、年份、价格等信息 ''' infos = strInfo.strip() .split('/')#有多作者的可能,这个方面就会出错 # print(infos) author = infos[0].strip().replace('\n','') # 作者 pub = infos[1].strip() # 出版社 year = infos[2].strip() # 年份 price = infos[3].strip() # 价格 ''' infos = strInfo.strip().split('/') # 有多作者的可能 author_list = infos[:-3] author = '' for item in author_list: author += '/' + item.strip().replace('\n', '') # 作者 author = author[1:] # 因为多了一个/,所以第一个/不输出,优化输出效果 pub = infos[-3].strip() # 出版社 year = infos[-2].strip() # 年份 price = infos[-1].strip() # 价格 rating = table.find('span', class_='rating_nums').text.strip() # 评分 remark_num = table.find('span', class_='pl').text.replace('\n', '').strip()[20:-3] # 评分人数 try: quote = table.find('span', class_='inq').text.replace('\n', '') # 名言 except: # 名言可能不存在 quote = '' # 优化输出模式 print('---------------------------------华丽的分割线--------------------------------------') # print('图片封面链接', '书名', '作者', '出版社', '年份', '价格', '评分', '评分人数', '名言') print('图片封面链接:', img) print('书名:', title) print('作者:', author) print('出版社:', pub) print('出版年份:', year) print('售价:', price) print('评分:', rating) print('评价人数:', remark_num) print('名言或评注:', quote) # print(img, title, author,pub, year, price, rating,remark_num, quote) data_list.append((img, title, author, pub, year, price, rating, remark_num, quote)) return data_list # 存储数据 def insert_data(data_list): conn = pymysql.connect(host='127.0.0.1', port=3306, user='root', password='password', db='spider', charset='utf8') # 连接数据库 cur = conn.cursor() # 用于访问和操作数据库中的数据(一个游标,像一个指针) # 首先得保证存在spider数据库,然后库中有books表,属性和下面的对应 sql = 'insert into books(img_href, title, author,pub, pub_year, price, grade,remark_num, quote) values(%s,%s,%s,%s,%s,%s,%s,%s,%s)' # 插入多条 cur.executemany(sql, data_list) # data_list类型是列表中嵌套多个元组比如[(),(),()] conn.commit() # 提交事务,执行了这一步数据才真正存到数据库 cur.close() # 关闭游标 conn.close() # 关闭数据库连接 if __name__ == '__main__': for page in range(10): print('第{}页'.format(page + 1)) single_url = 'https://book.douban.com/top250?start={}'.format(page * 25) # 图书每一页的url,有多页的时候需要观察url的规律 text = get_html(single_url) # 获取网页内容 # print(text) dataList = ana_by_bs4(text) # bs4方式解析 # insert_data(dataList) # 数据存入数据库 ```
- python
- 2020-05-28
- 666已阅读
- 666
记录一次手机app数据爬取的经历(Fiddler(手机抓包)+tasker(定时启动app)+夜神模拟器)
# 1. Fiddler配置及抓包 先配置好fiddler和手机(模拟器也可以),然后用手机或者模拟器运行app,用fiddler抓包找到自己想要的内容,然后可以自定义script保存数据。(实属无奈,用python模拟不了一些东西) 电脑最好是笔记本,这样能和手机保持统一局域网内;其他不多说,直接说步骤了。 ## 一.对PC(笔记本)参数进行配置 ### 1. 配置fiddler允许监听到https(fiddler默认只抓取http格式的) 打开Fiddler菜单项Tools->TelerikFiddler Options->HTTPS, 勾选CaptureHTTPS CONNECTs,点击Actions, 勾选Decrypt HTTPS traffic和Ignore servercertificate errors两项,点击OK(首次点击会弹出是否信任fiddler证书和安全提示,直接点击yes就行),见图: 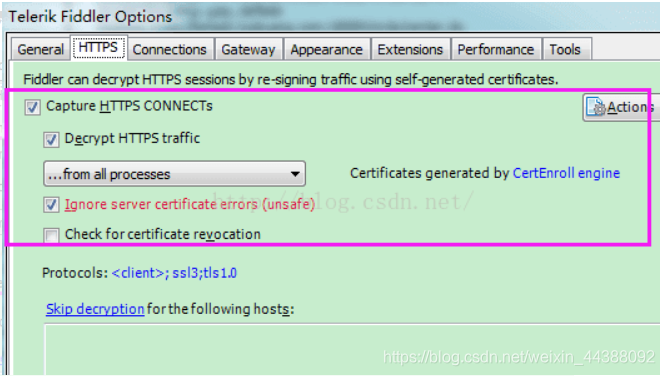 ### 2 配置fiddler允许远程连接 上一步窗口中点击Tools->TelerikFiddler Options->Connections,勾选allow remote computers to connect,默认监听端口为8888(下图Fiddler listens on port就是端口号),若端口被占用可以设置成其他的,配置好后要重新启动fiddler,如下图:  点击完成之后,PC端配置完成,接下来开始配置手机端,以安卓为例,iOS方法同安卓; ## 二.对手机端进行参数配置 首先要保证手机和电脑都处于同一个网络; 然后要知道电脑的ip地址(当然这个电脑是安装fiddler的电脑),电脑ip地址可通过cmd,输入ipconfig查询,或网络共享中ipv4找到,我的是192.168.103.53, 再者要知道fiddler的端口号,Tools->TelerikFiddler Options->Connections,port中值就是端口号,一般默认为8888;接下来开始操作手机; ### 1.**第一步**:手机和电脑连接同一个网络,打开手机浏览器,输入http://ip:端口号,点击前往;见下图: 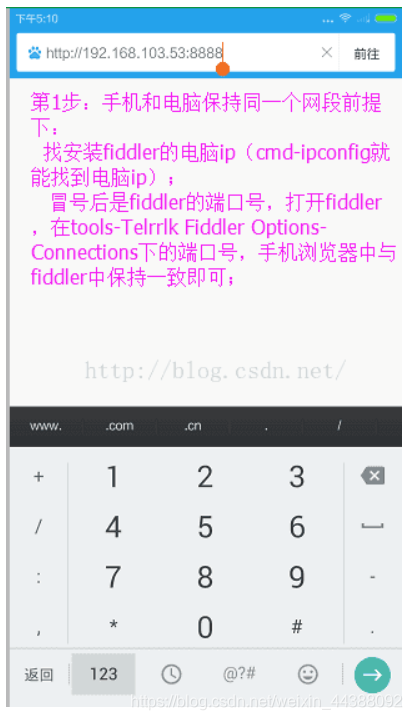 ### 2.**第二步**:前往之后会跳转到证书下载页,见下图: 点击FiddlerRootcertificate下载证书;  ### 3.**第三步**:点击下载之后,安装证书并起个名字,随便写就行,点击确定; 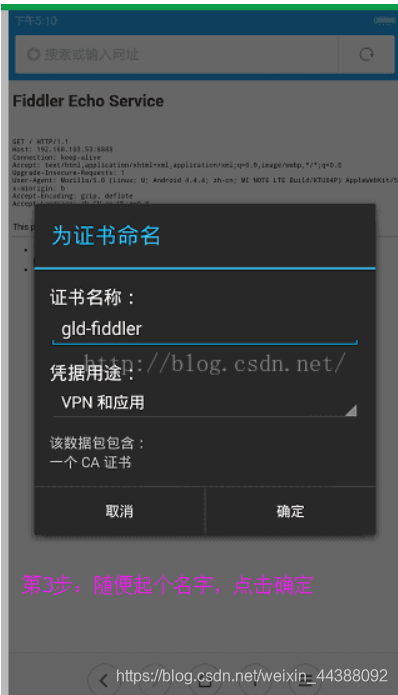 ### 4.**第四步**:要求设置一个手机密码,自己设置一个,记住密码就行,最后不用了去系统-安全-密码中去掉即可; 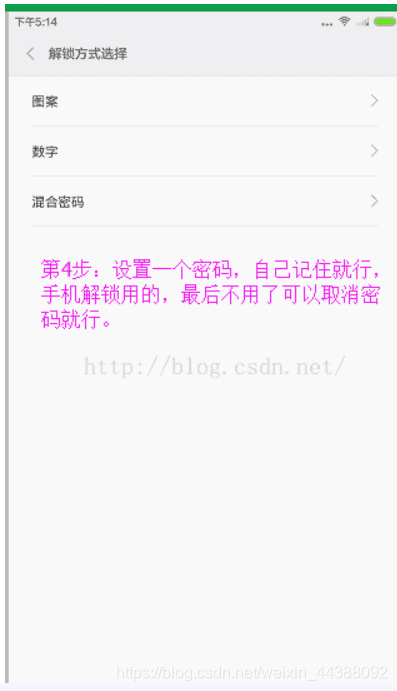 ### 5.**第五步**:更改手机无线网的代理 手机系统设置-无线网-点击高级,代理选择手动,主机名就是fiddler的电脑ip地址,端口号,就是fiddler的端口号,与浏览器中ip:端口号保持一致,点击确定即可,模拟器手机系统设置-无线网长按点击修改网络进入下图 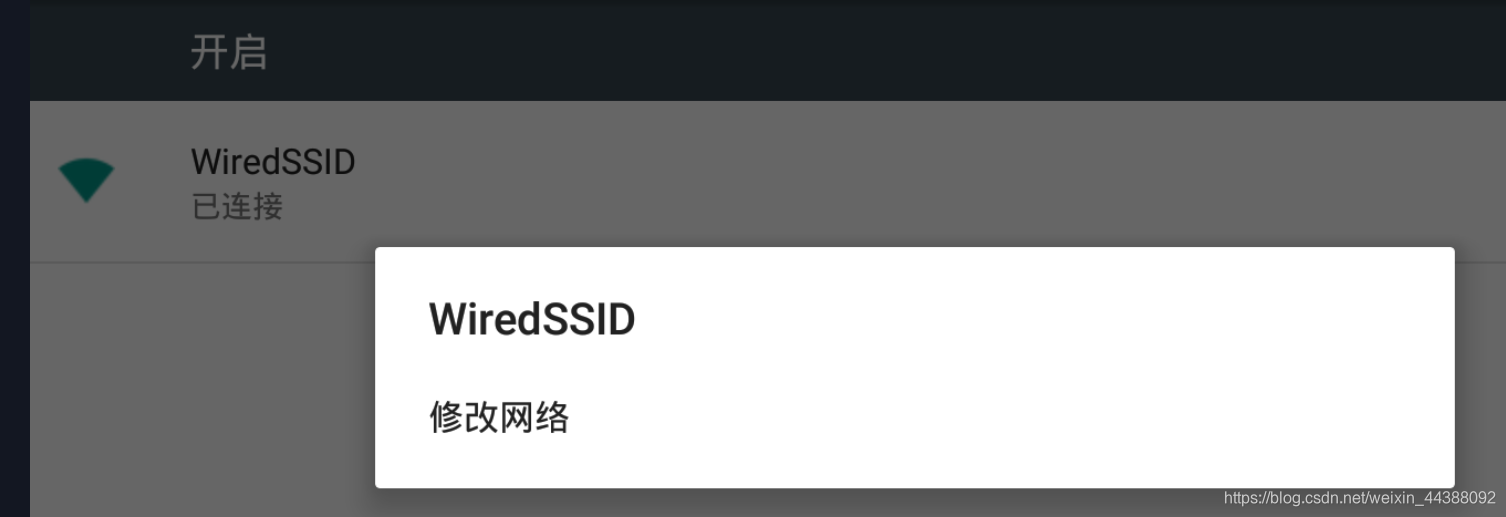 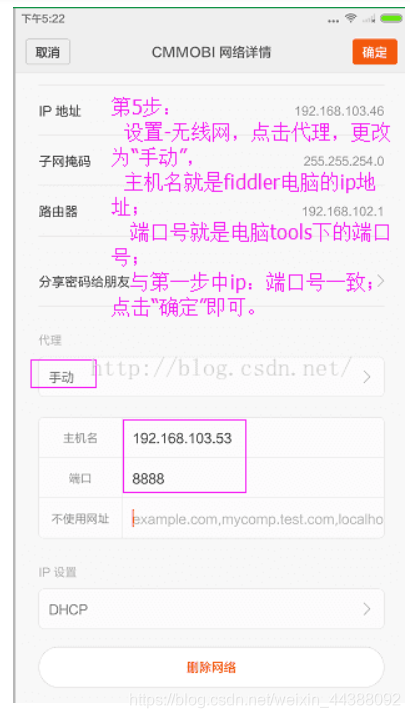 ### 6.操作手机,电脑fiddler中会显示一些http信息,成功; ## 三. 其他 1.停止电脑对手机的网络监控 系统设置-wifi,找到代理,去掉即可; 2.删除手机中证书 安卓系统设置—安全—受信任的凭证—用户,点击证书删除即可; 3.删除手机上密码 手机系统—安全—密码,删除系统密码即可; ## 四. 自定义脚本保存json文件 点击fiddler的FiddlerScript进入脚本编辑,然后在 OnBeforeResponse添加自定义代码 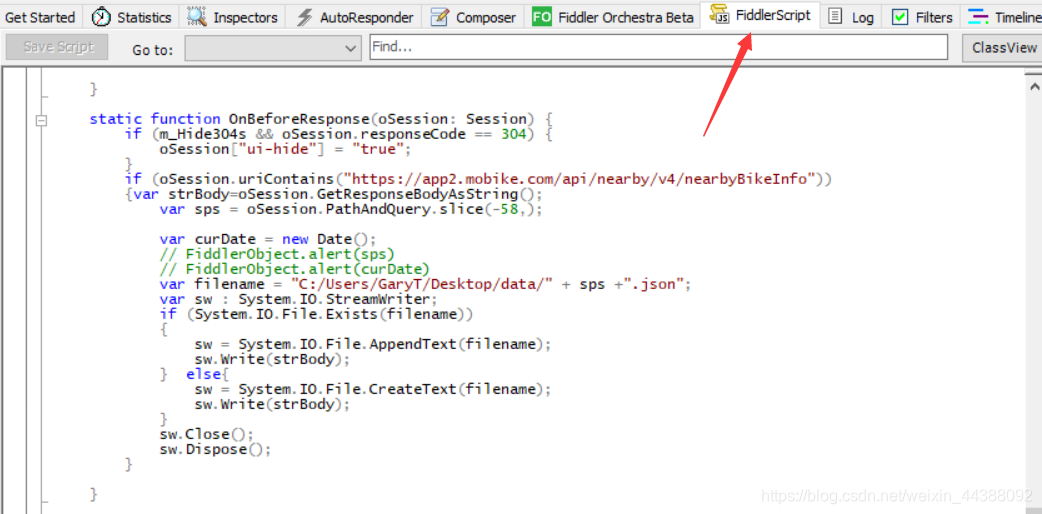 ```csharp if (oSession.uriContains("https://app2.mobike.com/api/nearby/v4/nearbyBikeInfo"))//这个url需要改为你需要保存的url,url不一定要全,但是最好是唯一的,比如我的真实url是https://app2.mobike.com/api/nearby/v4/nearbyBikeInfo?__skck=0b1764422bb59c7fda46878a2f6dba13&__skts=1596517503&__skua=d41d8cd98f00b204e9800998ecf8427e&__skno=fbc91d4b-7574-499b-b978-6e456e1cd8d2&__skvs=1.1&__skcy=J5R%2B6yx8AHOvAYD2j%2BtCkN1anxk%3D,但是我只是公共前缀即可 {var strBody=oSession.GetResponseBodyAsString(); var sps = oSession.PathAndQuery.slice(-58,);//完整url获取58以后的的字符串 var curDate = new Date(); // FiddlerObject.alert(sps) // FiddlerObject.alert(curDate) var filename = "C:/Users/GaryT/Desktop/data/" + sps +".json"; //路径改为你自己的路径 var sw : System.IO.StreamWriter; if (System.IO.File.Exists(filename)) { sw = System.IO.File.AppendText(filename); sw.Write(strBody); } else{ sw = System.IO.File.CreateText(filename); sw.Write(strBody); } sw.Close(); sw.Dispose(); } ``` # 2. tasker实现app的定时运行 如果有需求也可以下载按键精灵等执行点击、滑屏等其他操作,我的需要只要定时打开和关闭app即可。 tasker下载链接 :https://www.lanzous.com/iafh29i(不保证永久有效) 软件已经完美破解并汉化,资源来自网络搜集与本人无关 教程 主要是两步 ## 2.1 添加任务 点击任务,然后点击左下角的+号添加任务 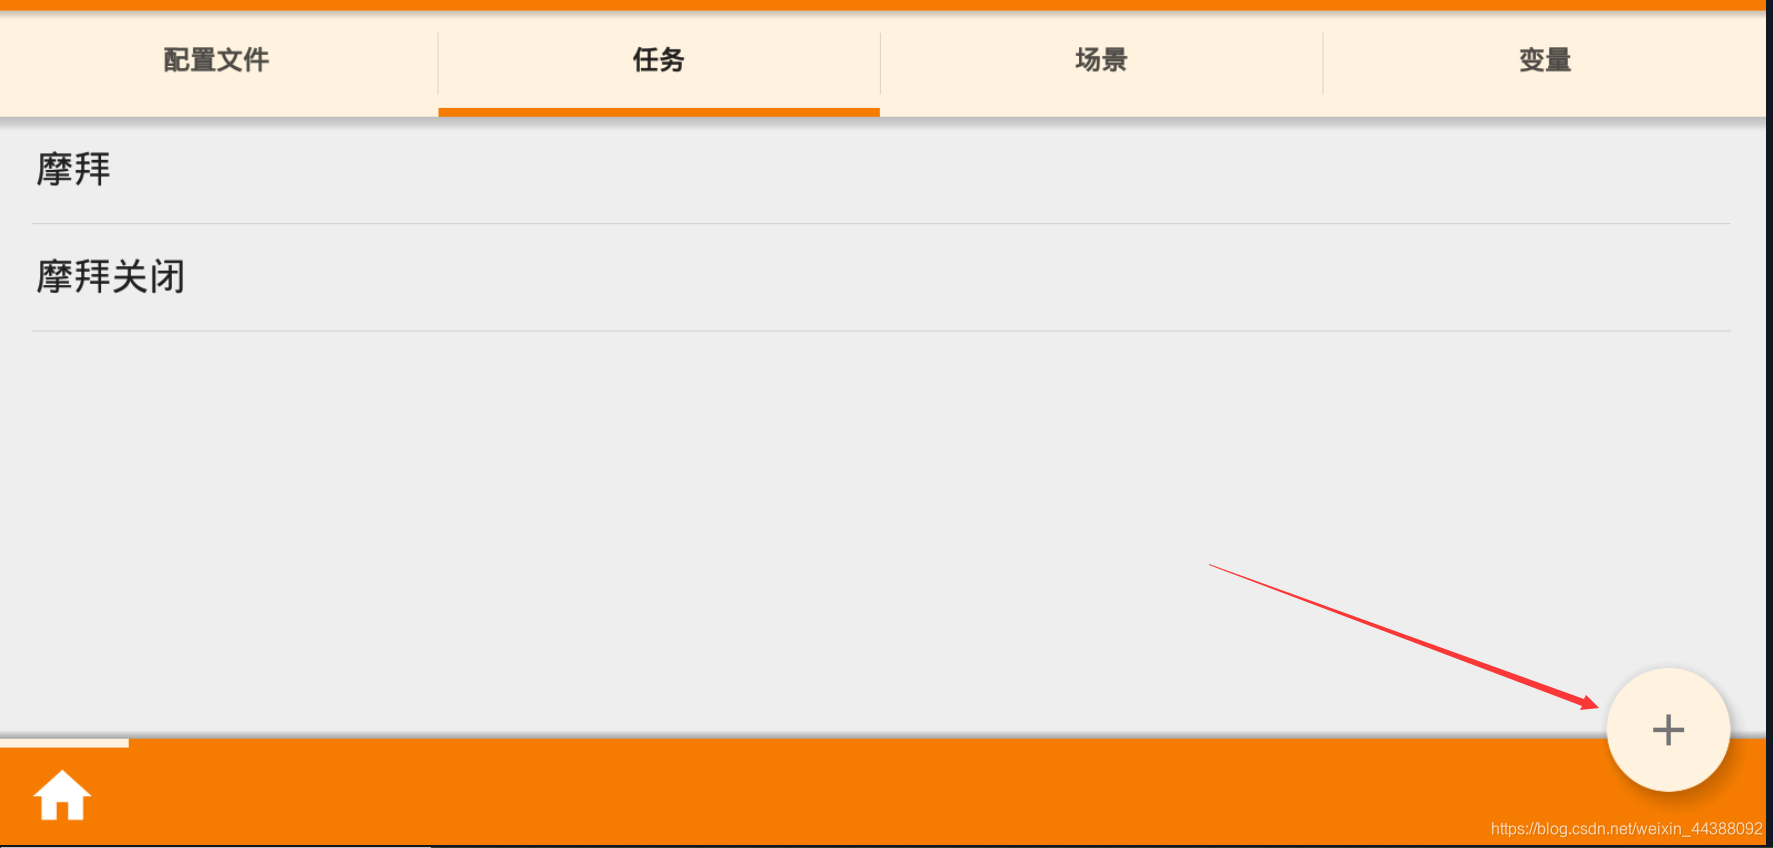 输入任务名,按√保存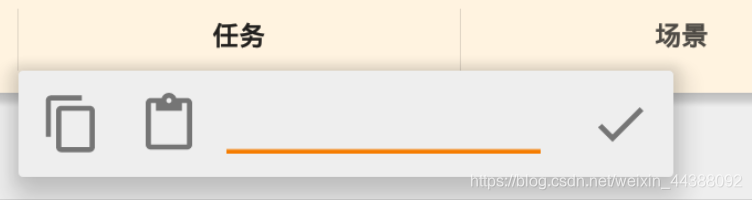 然后会进入任务编辑页面,点击+号编辑任务 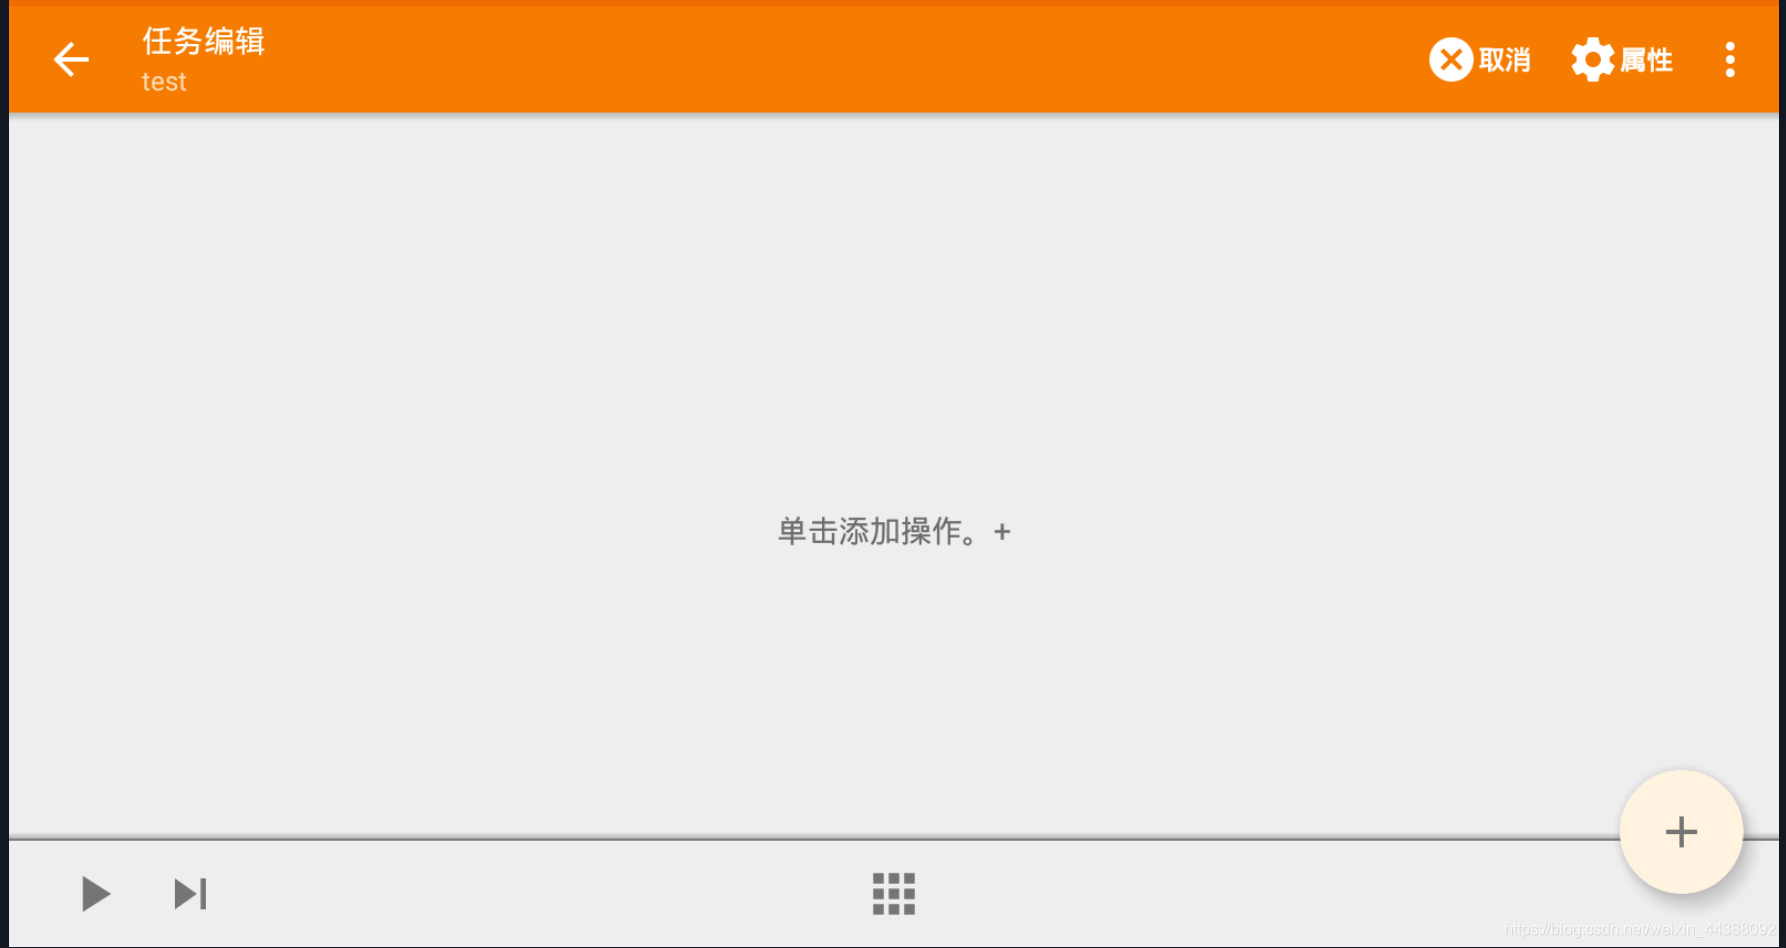 根据需要找到你想要的操作,我这里是打开应用,所以点击程序 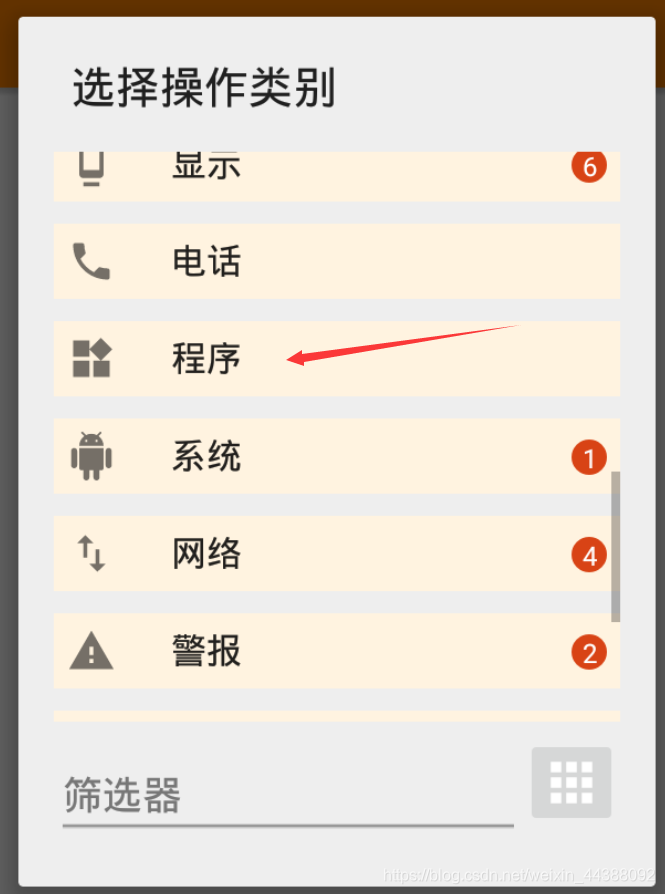 然后选择启动应用,后面同理创建一个结束应用的任务 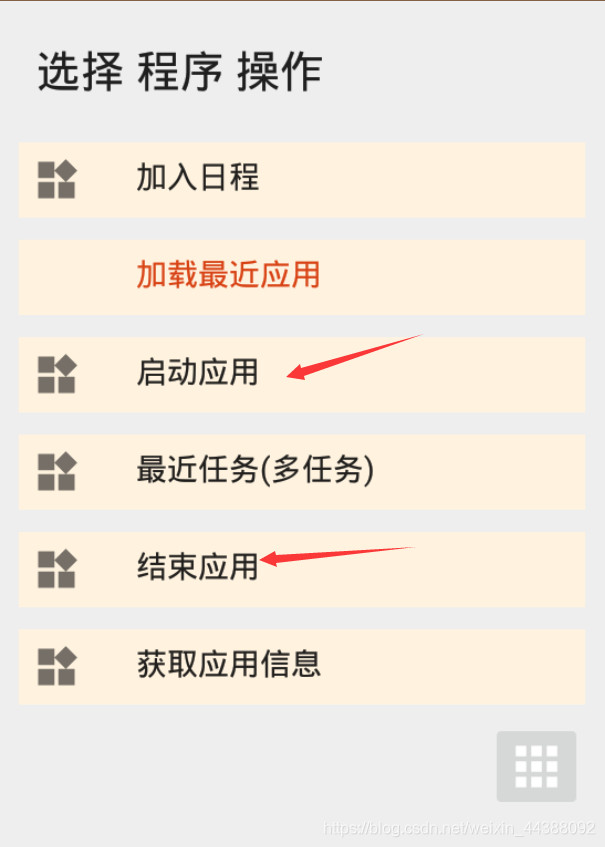 点击启动应用后跳转到应用选择页面,选择你需要启动的应用,比如我选择摩拜单车,接着会跳转到操作修改界面 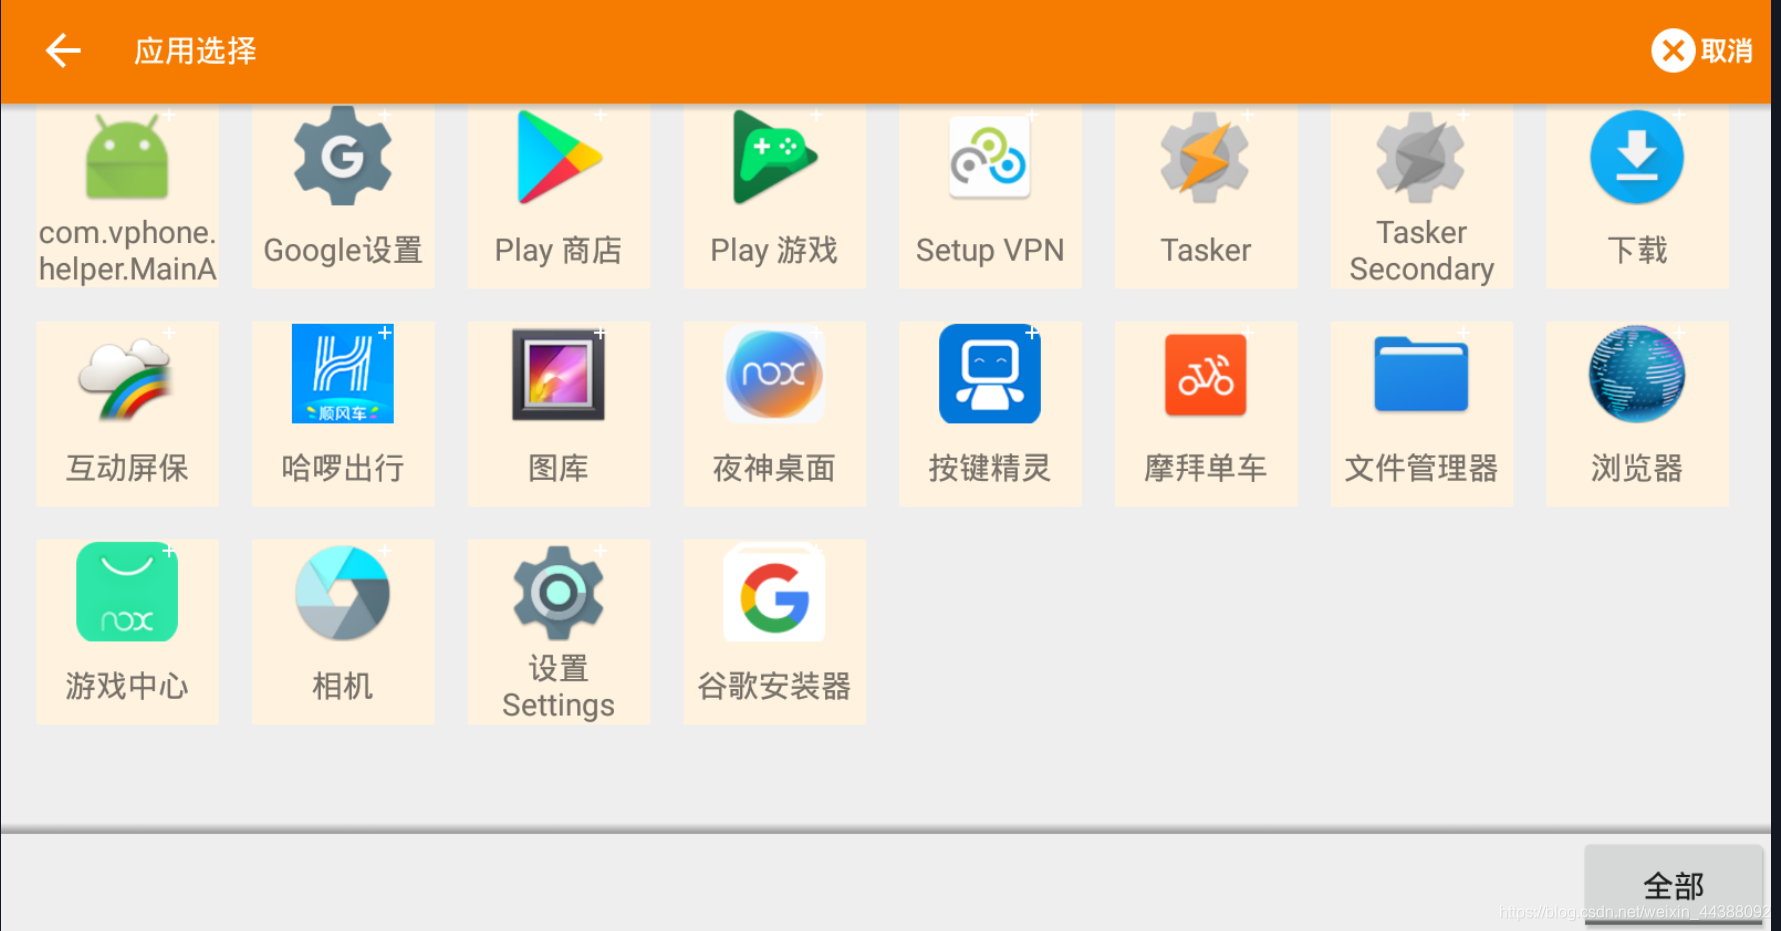 点击两次左上角的返回即可 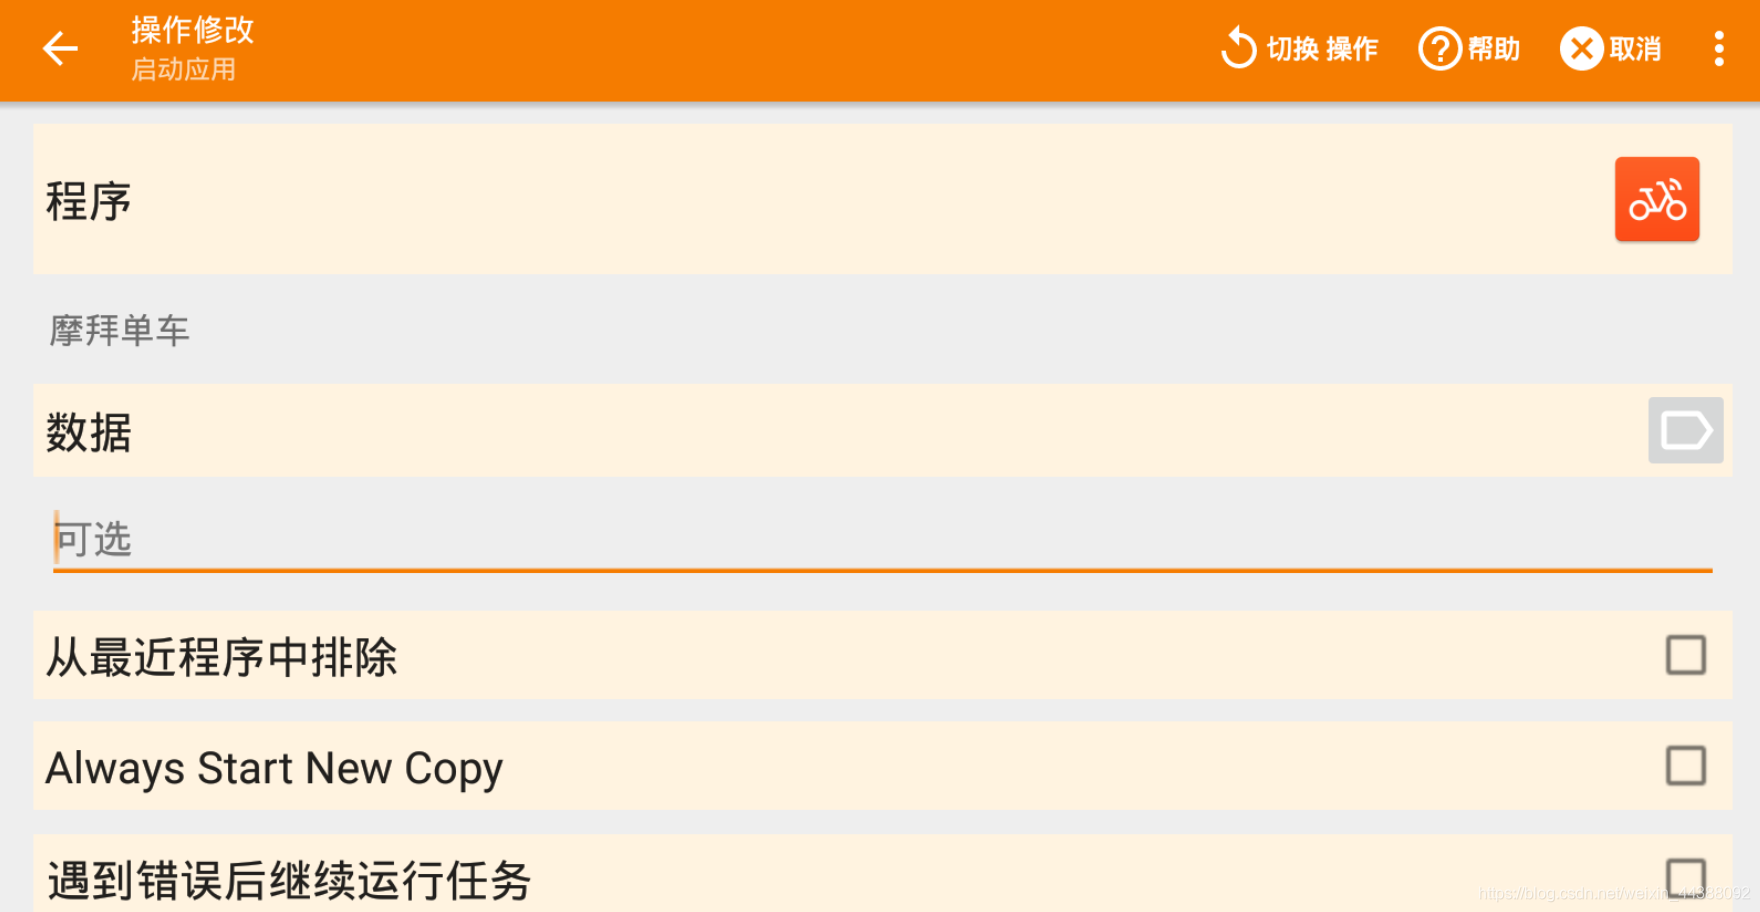 最后保存任务 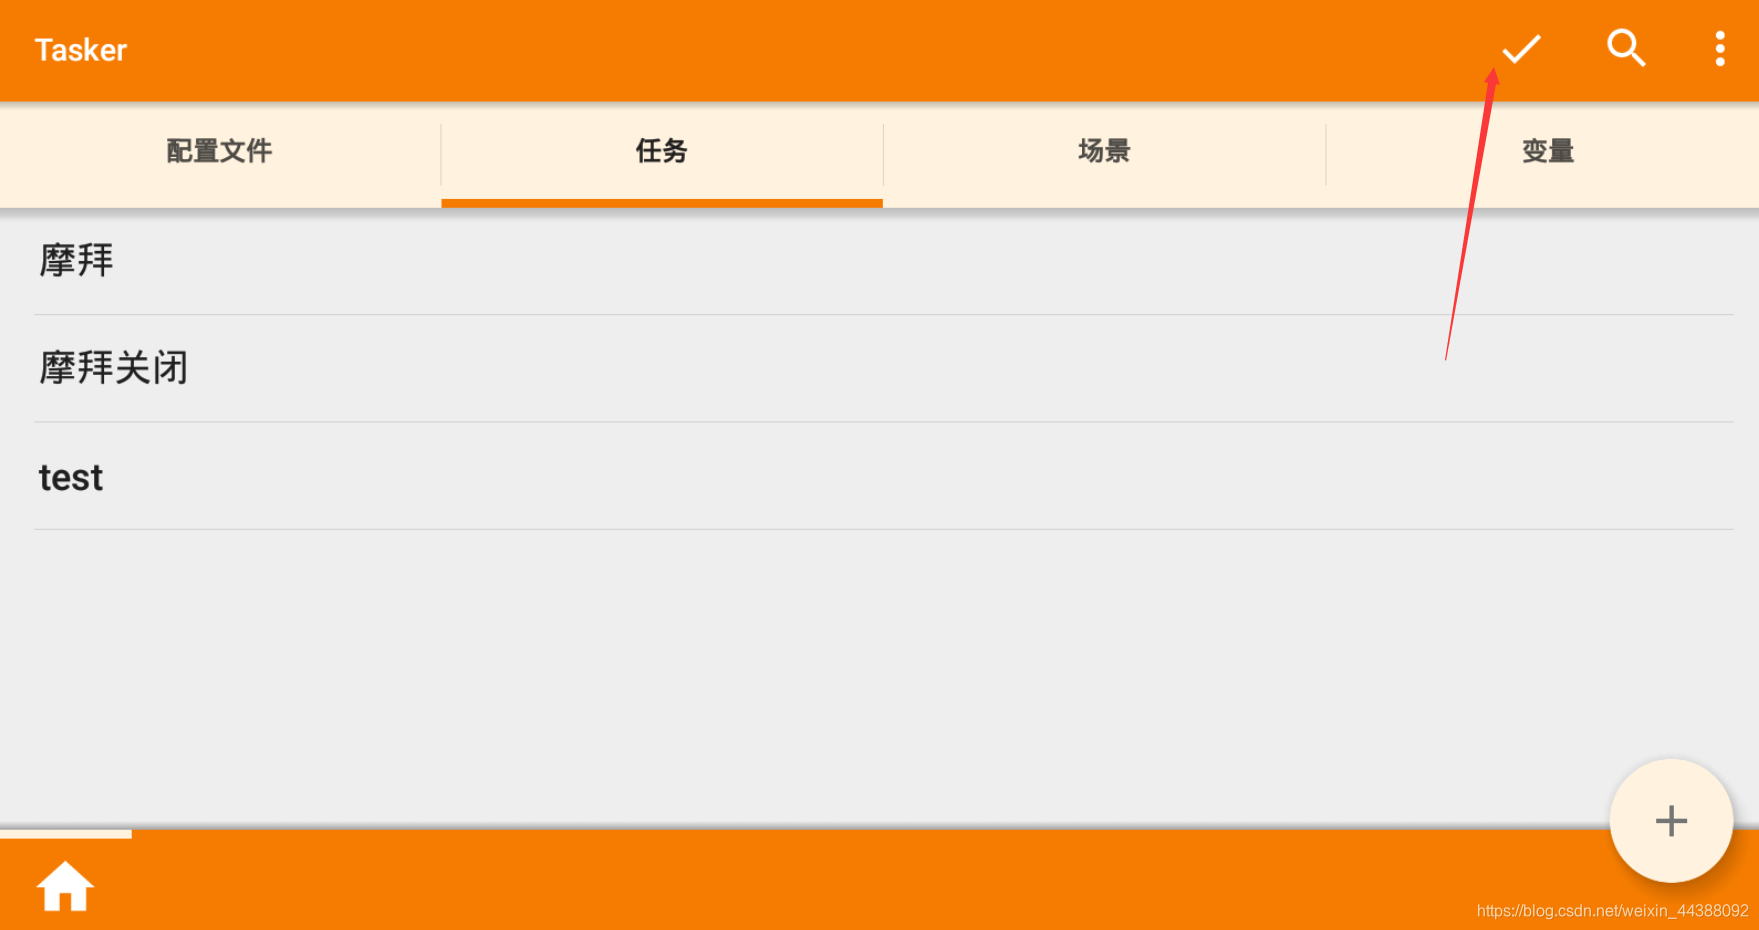 关闭应用记得打开root 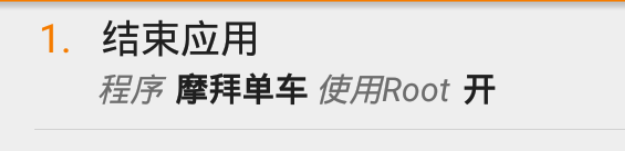 ## 2.2 添加配置文件 在配置文件的地方点击右下方的+,然后选择时间, 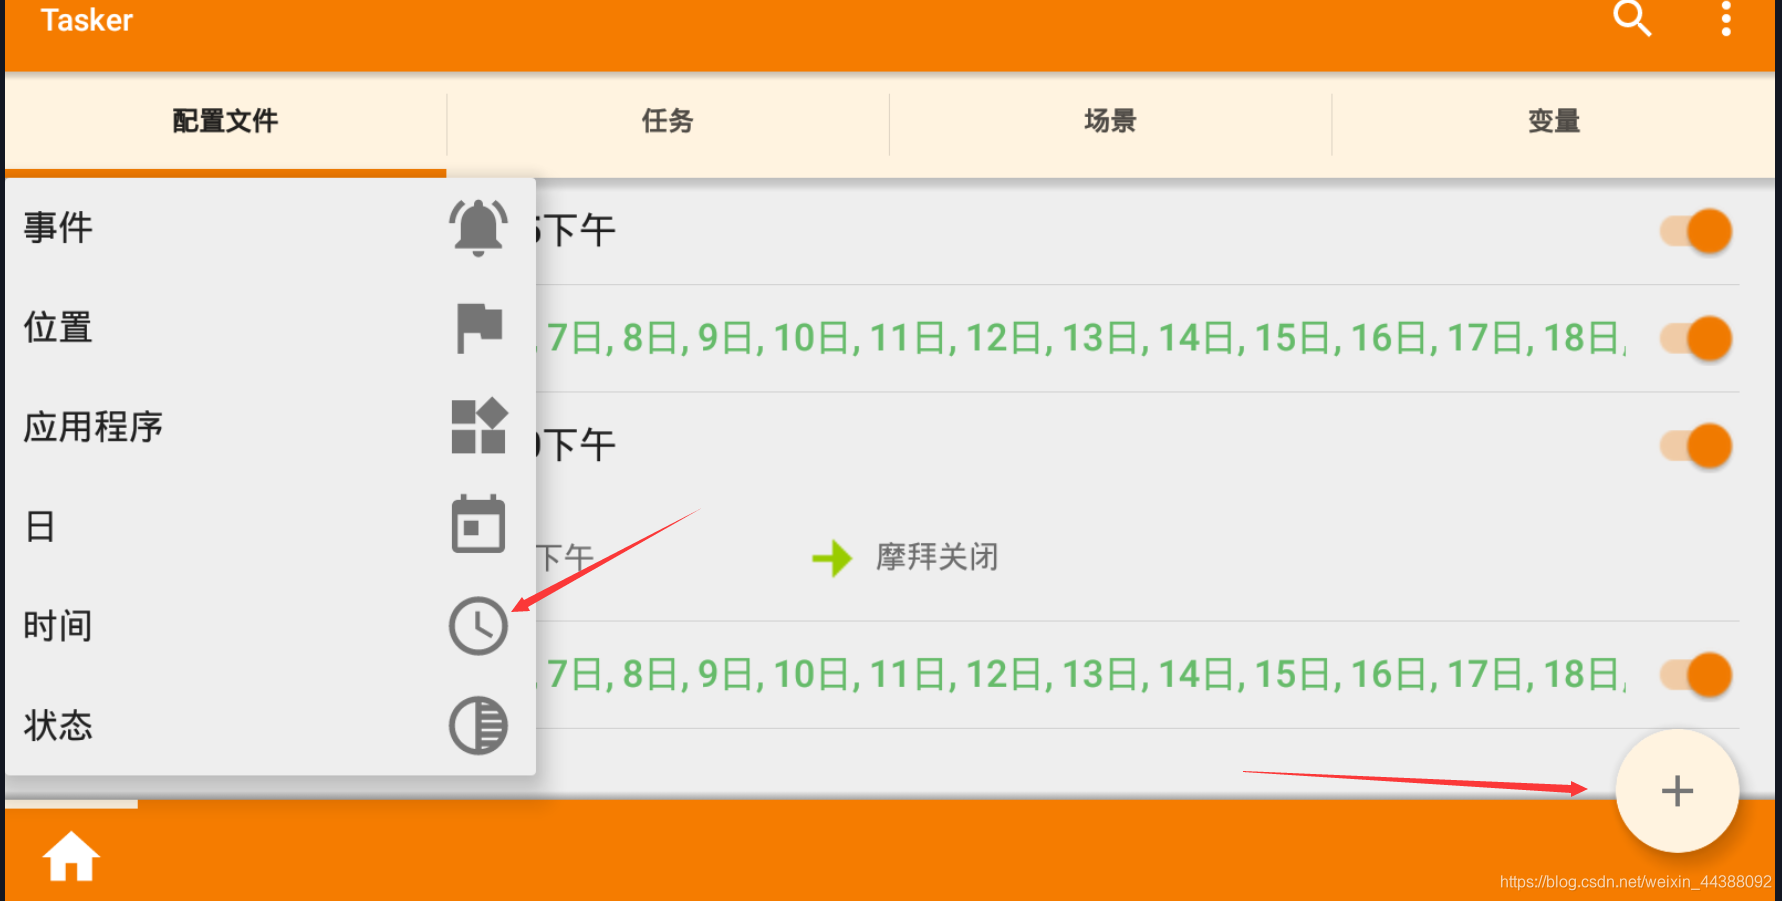 设置你需要运行的时间段,以及多久运行一次,时间间隔可以是小时或者分钟。设置好以后然后返回 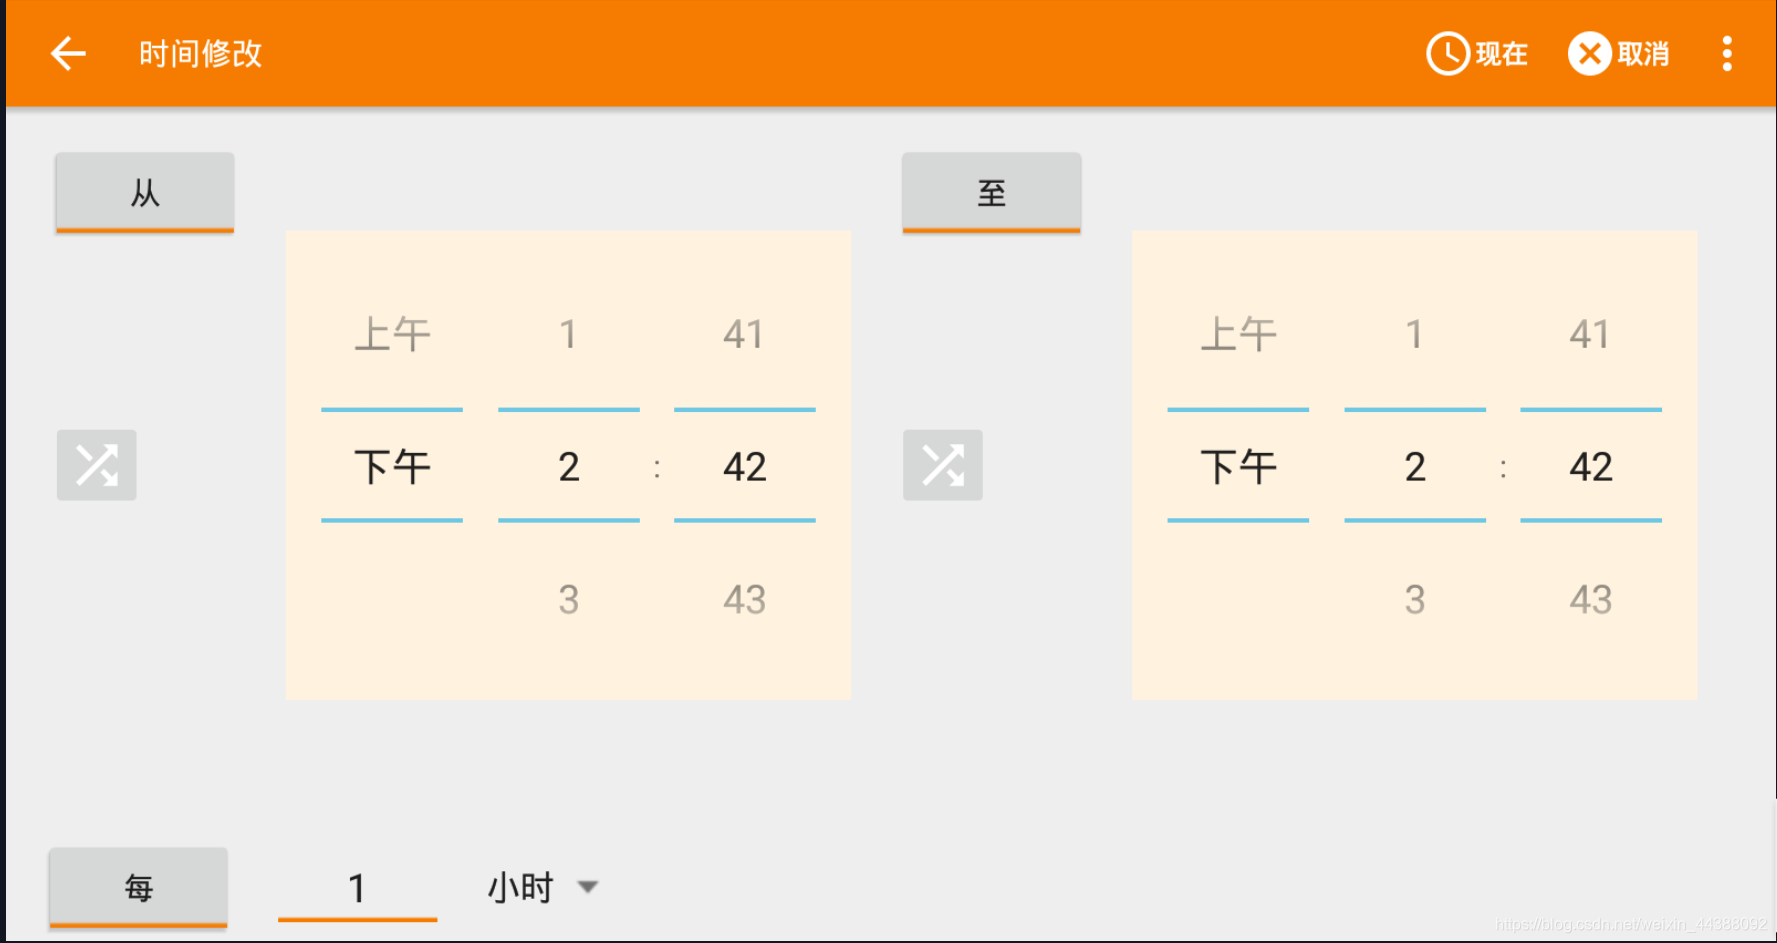 选择一个对应的任务即可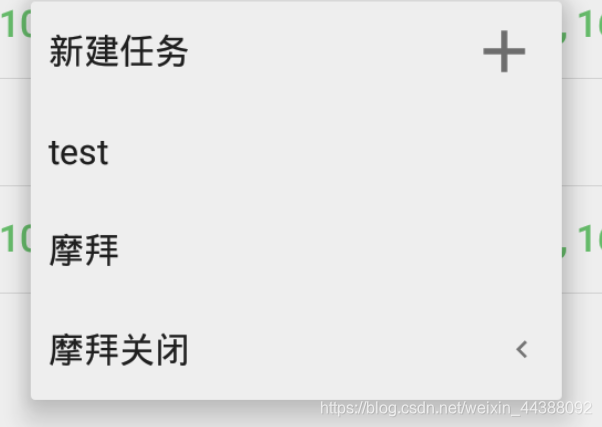 最后点击右上的保存即可 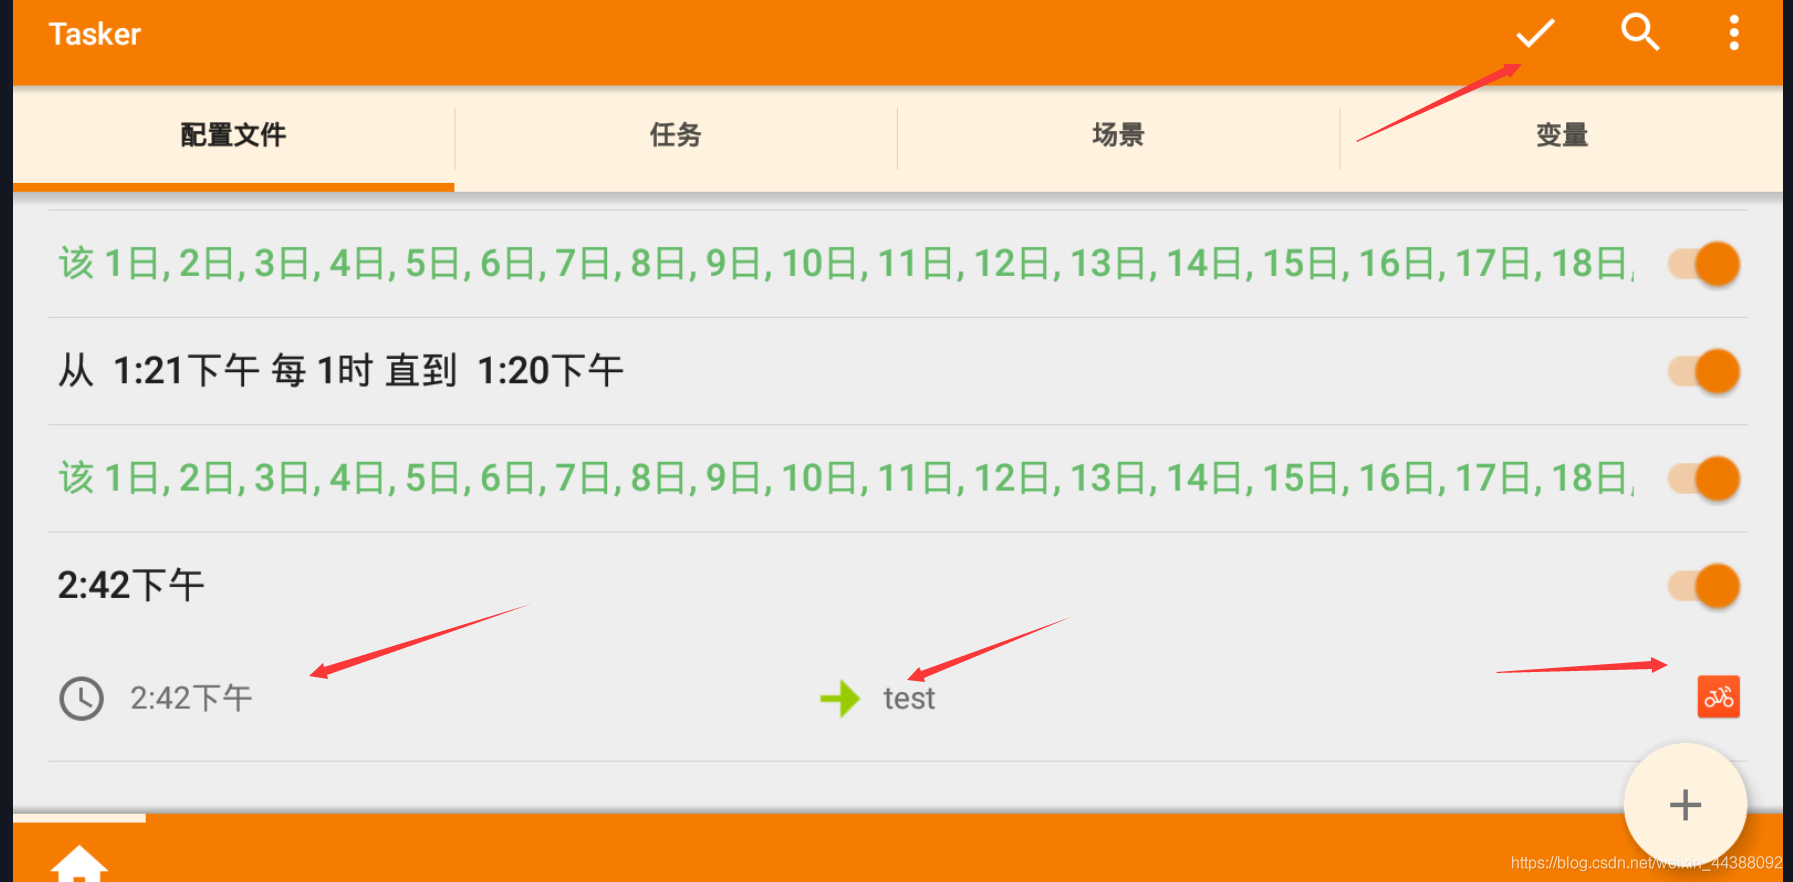
- python
- 2020-04-18
- 666已阅读
- 666